
Appearance
Assignments
An assignment is a unit of work, typically one loss, created from a published capture profile and placed in a team so its members see it in the field app.
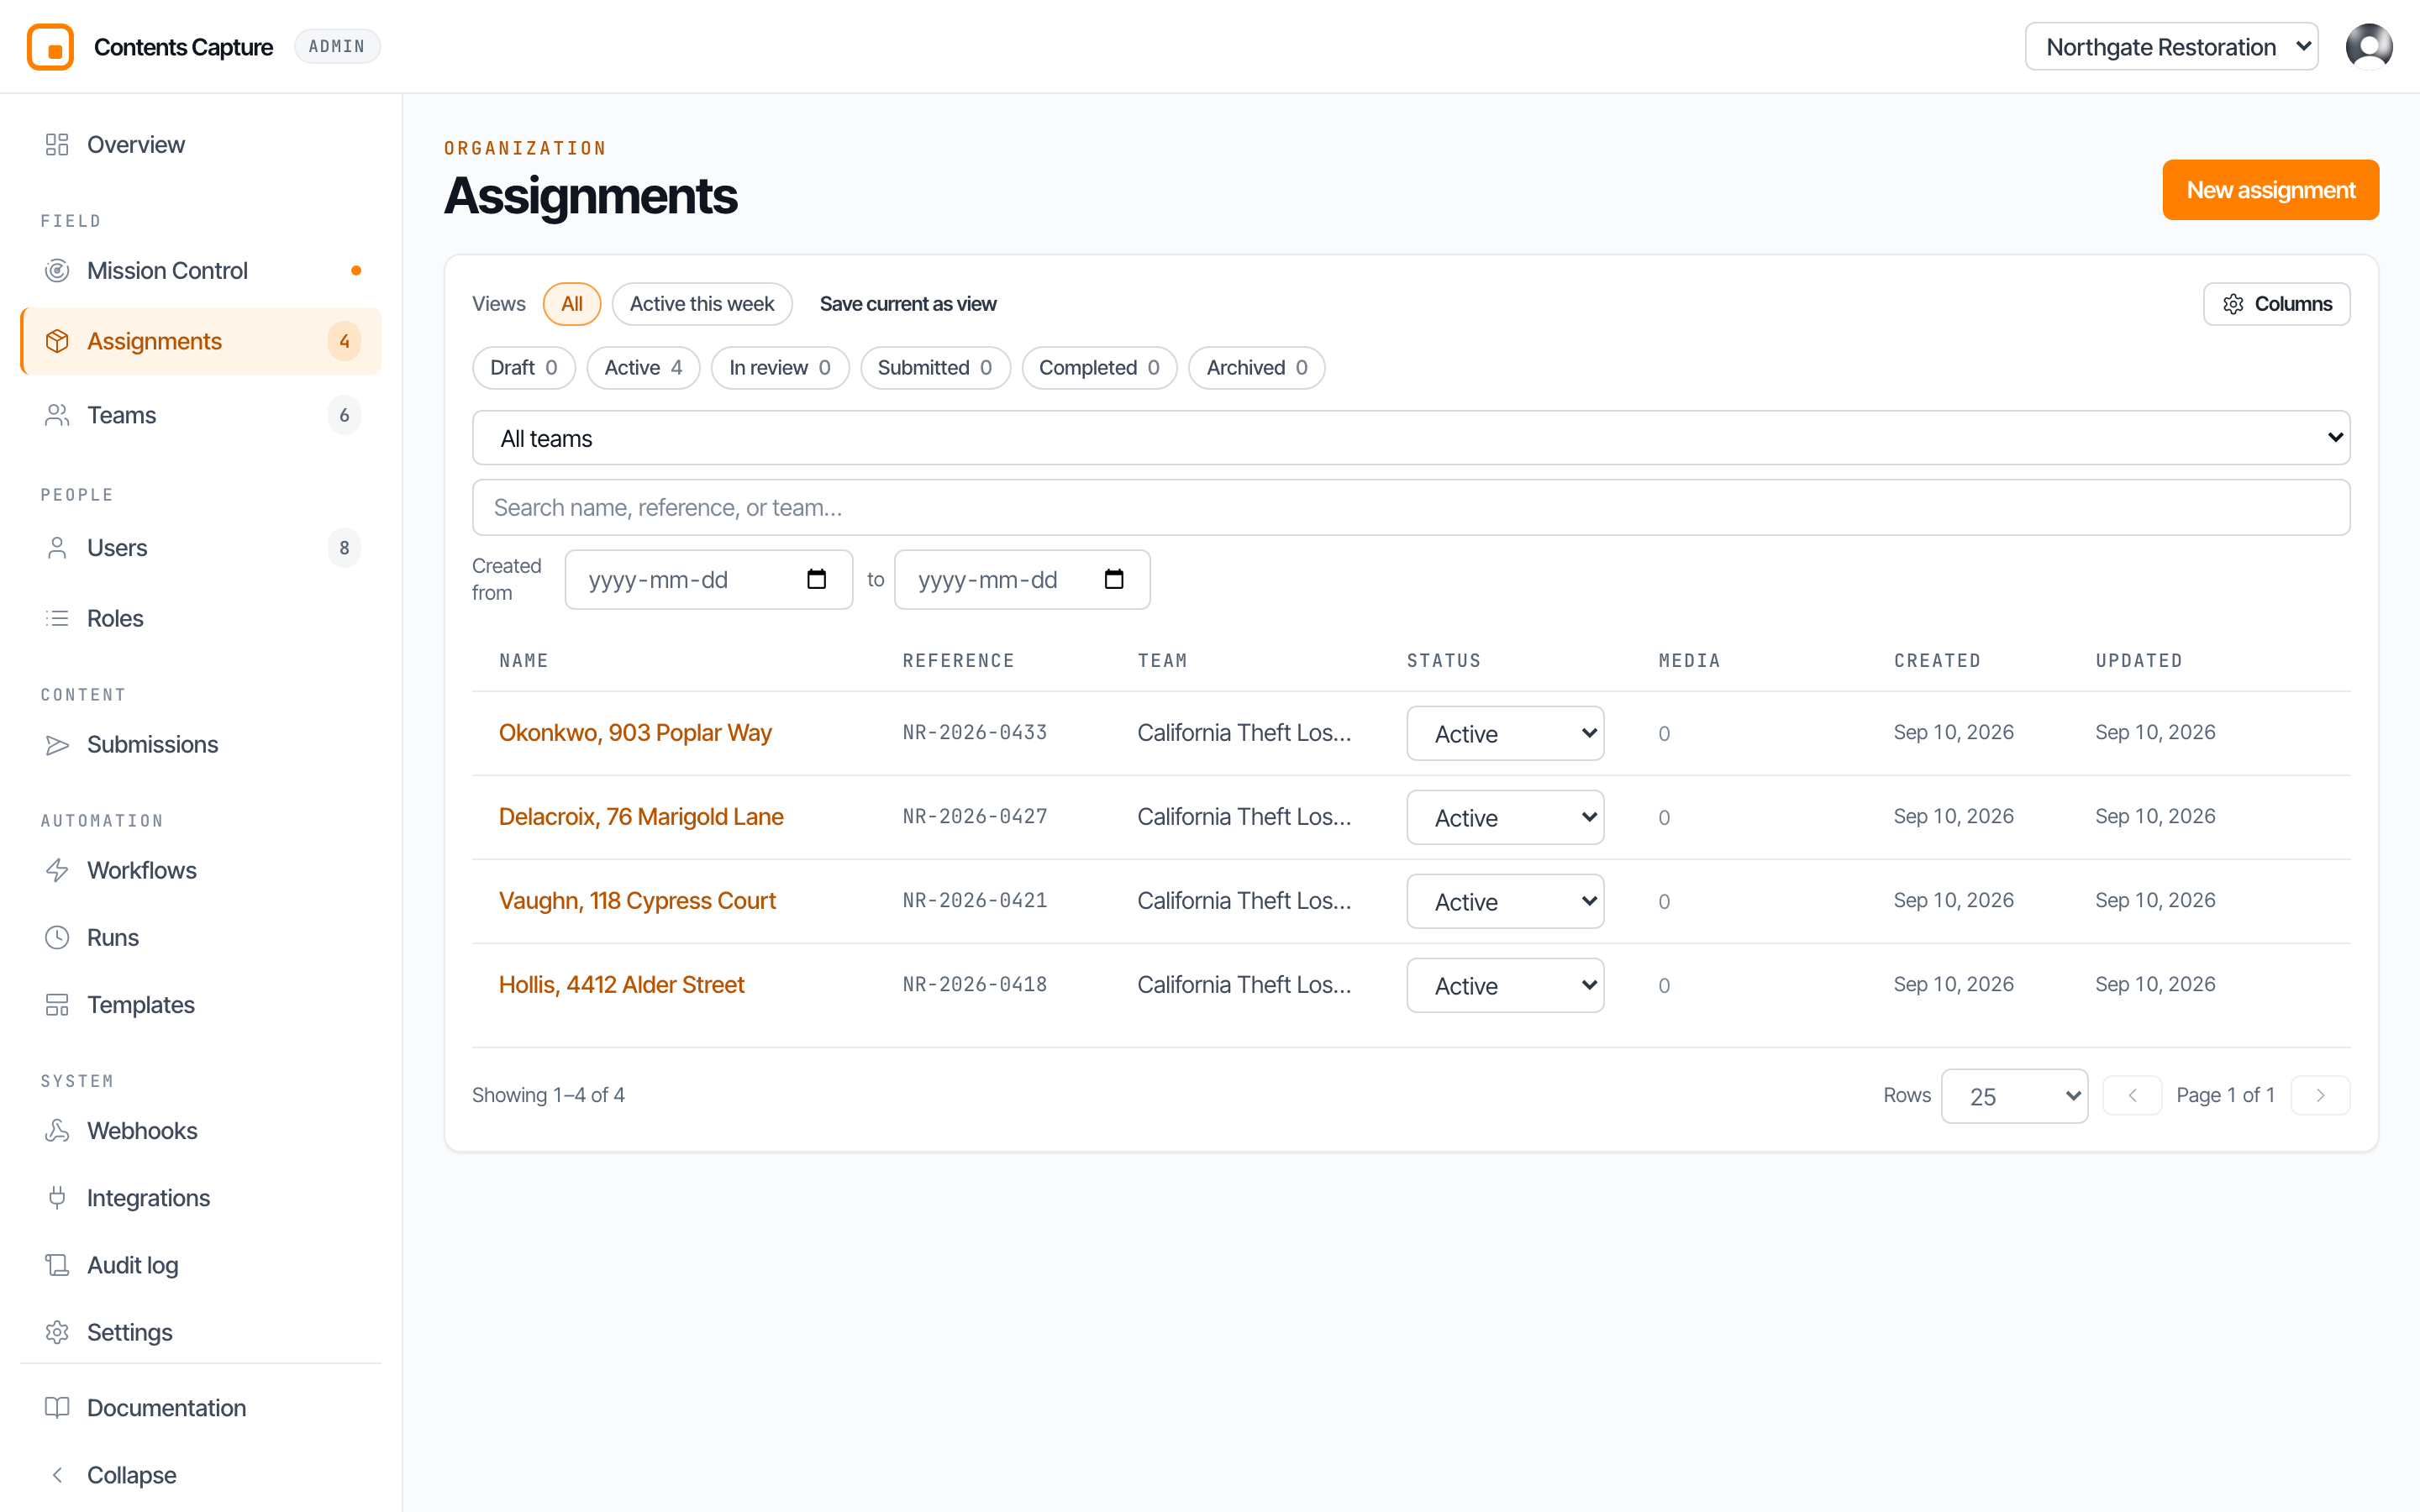
The assignments explorer
Open Assignments in the sidebar to see every assignment you have access to. The explorer is built for volume: filters, saved views, and a customizable table.
Status filter chips
Across the top, filter chips show each status with a live count. Click chips to include or exclude statuses; multiple chips can be active at once.
| Status | Meaning |
|---|---|
| Draft | Created but not yet put into the field. |
| Active | Being worked. Captures are arriving. |
| In review | Field work is done; office review is underway. |
| Submitted | Set automatically when every media item on the assignment belongs to a submission. Reverts to active automatically if new media arrives. |
| Completed | Reviewed and closed. |
| Archived | Retired from day-to-day lists. |
"Submitted" manages itself
You never set the submitted status by hand. The platform sets it when all captured media has been handed off in submissions, and clears it the moment new media arrives. Think of it as a signal light, not a workflow step. Your review workflow is in review → completed → archived. See Submissions and media.
Views bar
The views bar holds built-in views (All, Active this week) plus your saved views. A saved view remembers the whole table: the filters and search, the sort, and the columns (their order, which are hidden, and their widths). Click a saved view to put all of it back with one click. Views can be:
- Mine: personal, visible only to you.
- Shared: visible to the whole organization. Sharing requires team.manage. Use "Share with the whole organization" when saving.
To save one, set up the table the way you want it and click Save current as view. Name it, choose whether to share it, and tick Pin to the sidebar as a dashboard to add it to the sidebar at the same time.
Each saved view has a menu (the ... button beside it):
- Pin as dashboard / Unpin from dashboards: add it to the sidebar under Dashboard, or take it off. See Custom dashboards.
- Update with current table: replace what the view saves with the filters, sort and columns on screen now.
- Rename and Delete view: for your own views, or for shared views if you manage the organization.
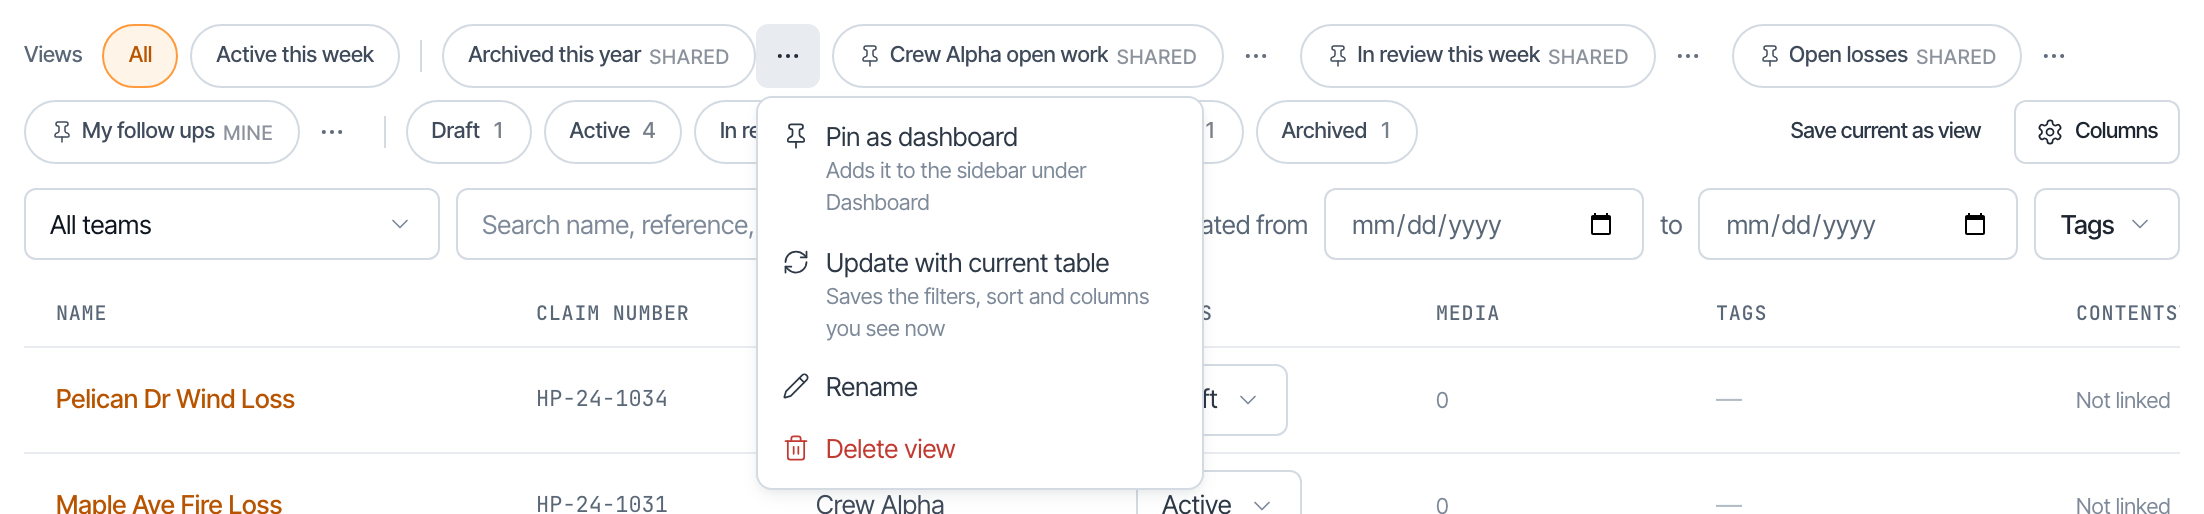
A pin icon on a view means it is pinned to your sidebar. Views saved before version 1.3.0 hold only filters: they keep whatever columns and sort the table already has.
Search and filters
- Search: "Search name, reference, or team", matches across assignment names, claim references, and team names.
- Crew select: filter to one team. Available when viewing org-wide.
- Created from/to: date range filters for the creation date.
Sorting
Click a column header to sort by it. Click again to reverse the order, and a third time to go back to newest first. The sorted column shows in orange with an arrow. Tags and ContentsVision cannot be sorted. Assignments with no value in that column (no claim number, for example) always sit at the bottom.

Column manager
Click the column manager to show or hide columns (the Name column always stays visible), reorder them by dragging, and resize them by dragging column borders. Your layout and sort are saved per person on this computer, so everyone can arrange the table to their liking without affecting colleagues. Saving or updating a view stores them in the view too.
Available columns: Name, Claim number, Team, Status, Media (counts), Tags, ContentsVision, Created by, Created, Updated. Created by (the person who made it) starts hidden.
The ContentsVision column links to the claim an assignment was imported into in ContentsVision, labeled with the claim number, and opens it in a new tab. The link opens the ContentsVision instance that holds the claim. Until ContentsVision imports the assignment, the cell reads Not linked. If an assignment is imported again into a different claim, the link follows the newest one.
Pagination
Choose 25, 50, or 100 rows per page at the bottom of the table.
Row actions
Each row offers inline actions (requires the assignment.manage permission):
- Status dropdown: change the status without opening it. It lists only allowed moves.
- Edit: change the name and reference.
- Delete: remove the assignment.
What deleting an assignment does
Deleting tombstones the assignment: it is removed from every device on the next sync, and it disappears from your lists. Captured evidence is retained in storage, so nothing submitted is destroyed, but the assignment itself is gone from the console and the field app.
Creating assignments with the wizard
Click New assignment to launch the four step wizard. It opens ready for you to type one assignment in, since that is what most people do.
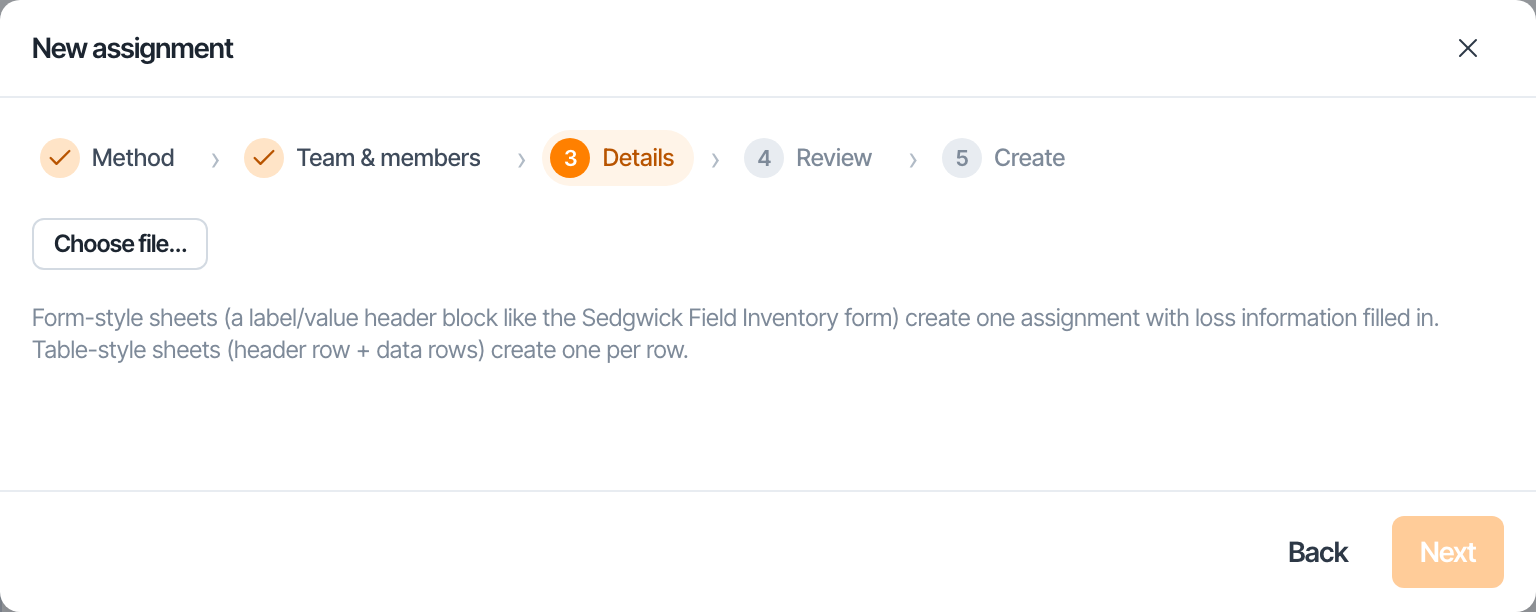
To create from a file instead, click Upload spreadsheet at the top of the first two steps. It takes a .xls, .xlsx, or .csv file, and the shape of the sheet decides the outcome:
- A form style sheet (a block of label/value pairs) becomes one assignment.
- A table (a header row with data rows) becomes one assignment per row.
Click Fill out form instead to go back to typing. Switching either way starts the details over.
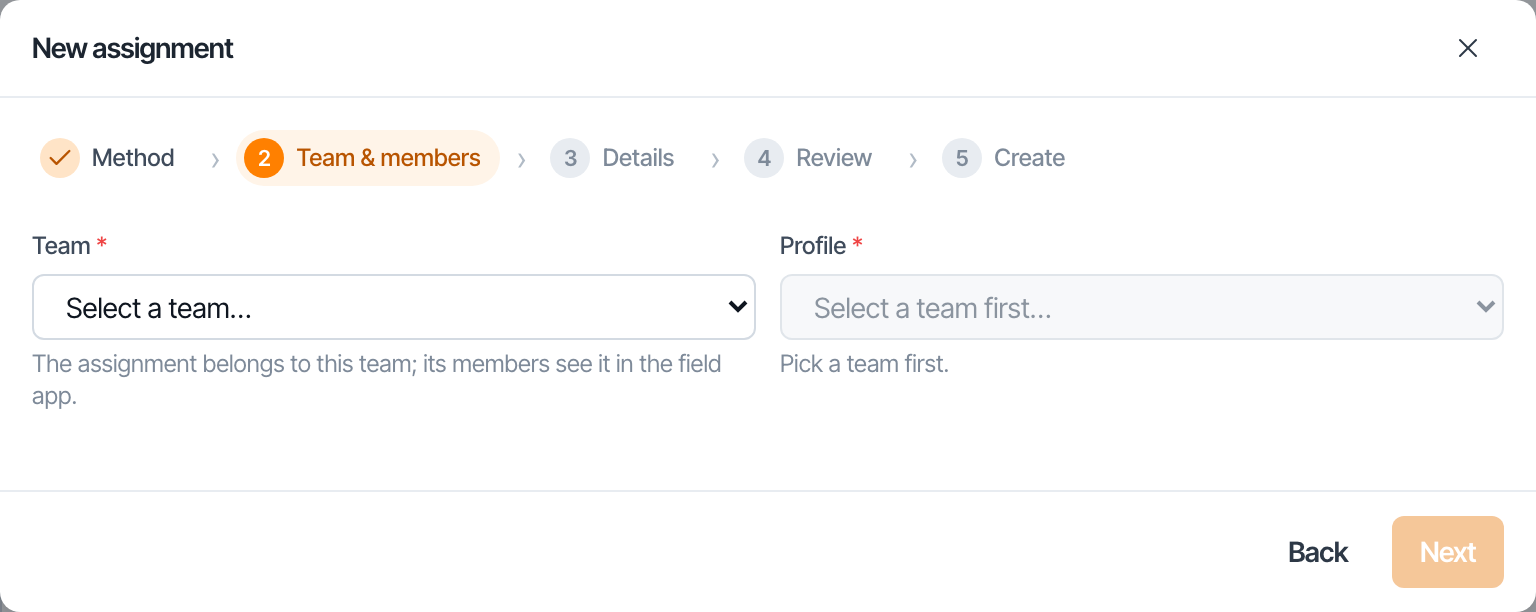
Step 1: Team and members
- Team: pick the team the assignment belongs to. Its members will see the assignment in the field app. When you only have one team, it is chosen for you.
- Capture profile: the checklist of questions adjusters answer while capturing. Most teams just use Default. Only published profiles appear, because assignments snapshot the profile's schema at creation. See Capture profiles.
- Members: every team member is listed and checked by default. Checked members get Can capture access to the assignment. At least one checked member must be a team lead (a team admin), so the assignment always has someone responsible for it. You can add someone already in your organization as a team lead; they join the team as a team admin. People join from ContentsEstimation, so someone new has to be added there first.
Everyone checked here gets an email (and a text, when we have their phone number) saying they were added. The email has two links: one opens the assignment in the ContentsCapture app on their phone, and one opens it in the admin console on a computer. Anyone without the app is offered the App Store.
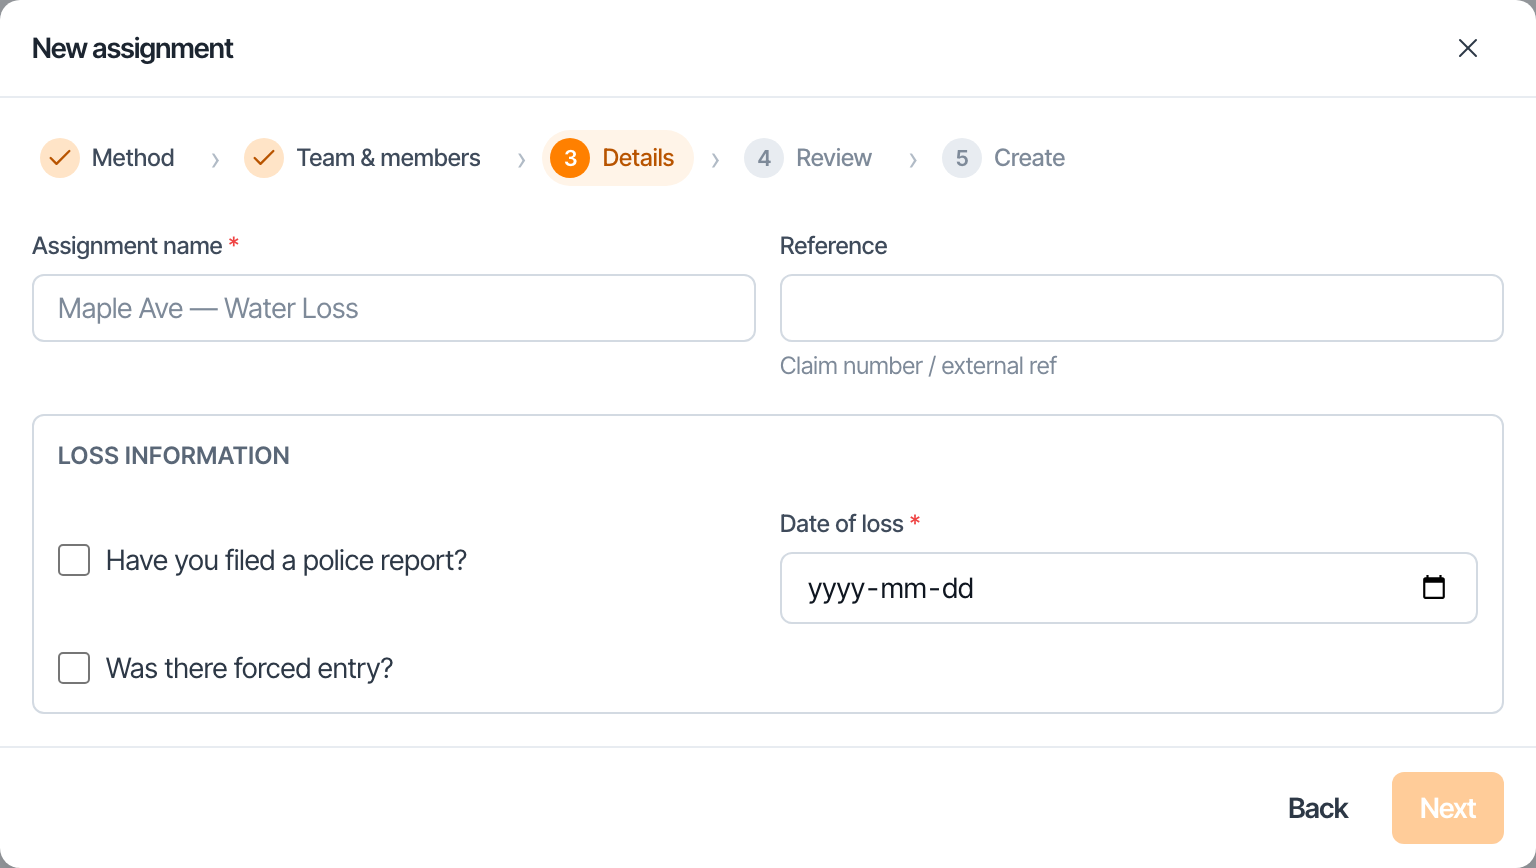
Step 2: Details
- Form: enter the File name (required) and the Claim number, then fill in the profile's assignment-scoped fields. See Scope.
- Spreadsheet: pick the sheet and header row. The wizard auto-detects the sheet shape and offers column mapping with fuzzy header matching: spreadsheet headers like "Claim #" are matched to profile fields like "Claim number" automatically, and you can correct any mapping by hand.
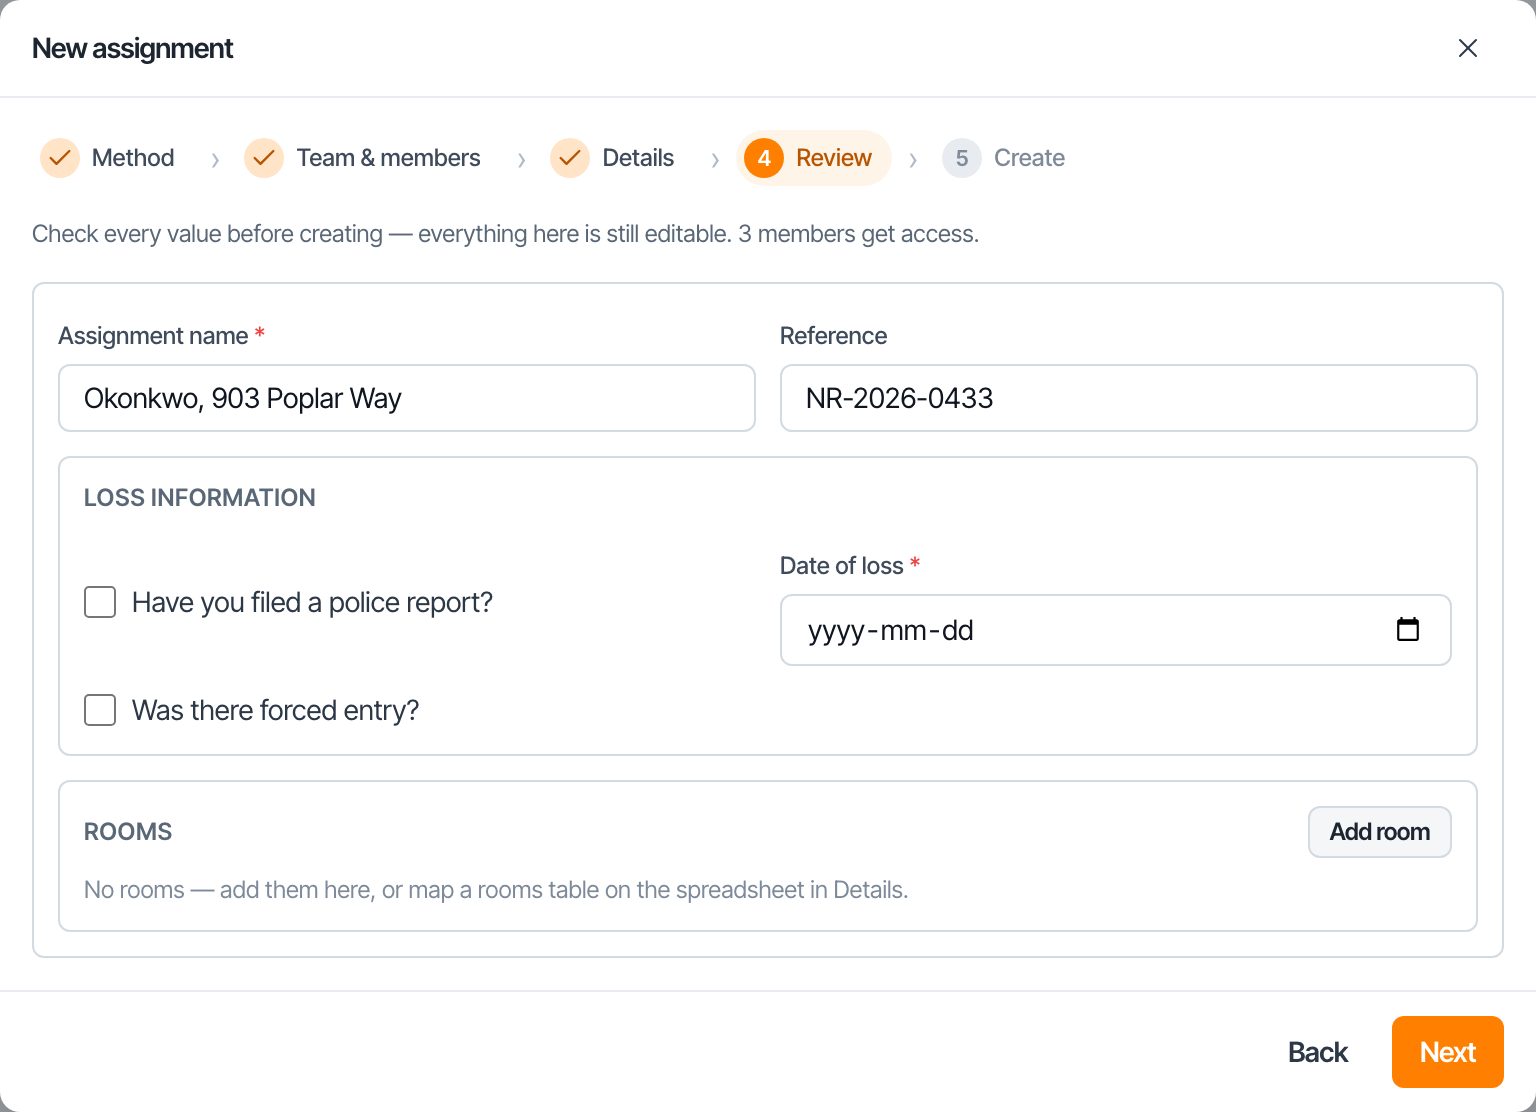
Step 3: Review
Every value from the previous steps is displayed and editable inline. Fix typos, adjust mappings, or re-check references before anything is created.
Step 4: Create
Creation runs as an ordered pipeline with per-stage status:
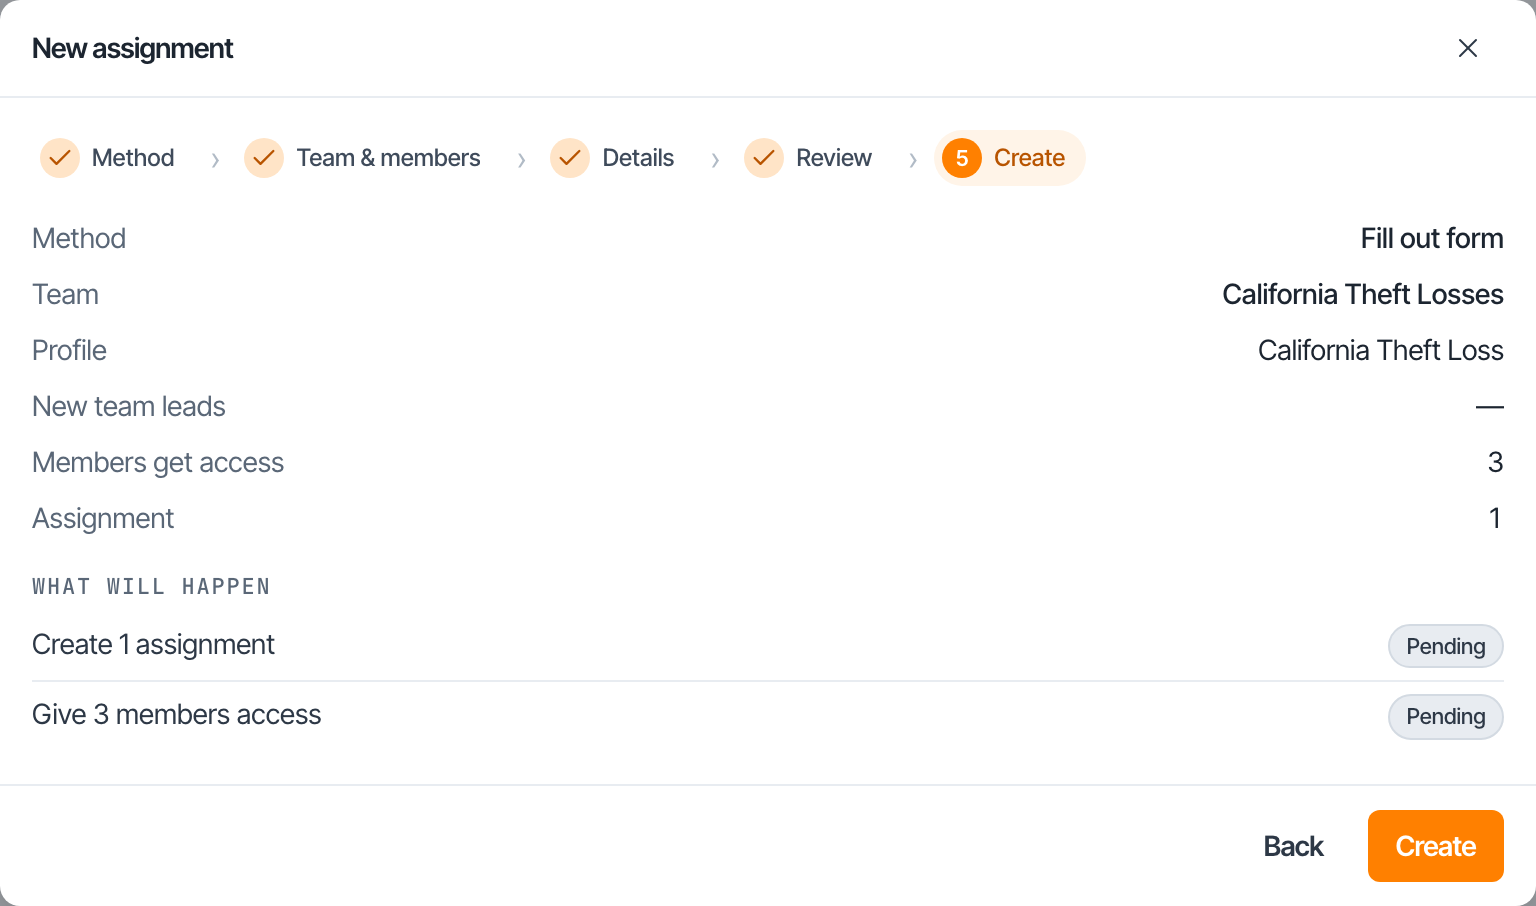
The new assignment appears in the explorer straight away.

- Seat leads
- Create assignments
- Create rooms
- Grant access
- Patch entity values
If something fails partway (a network drop, a service hiccup), the wizard offers resume-on-retry: it picks up where it stopped. Created records are real and are never rolled back, so retrying is always safe and never creates duplicates of finished stages.
Bulk import from Settings
For larger batches, go to Settings → Organization → Import assignments from spreadsheets:
- Upload multiple
.xls,.xlsx, or.csvfiles at once. - Configure each file in its own dialog: crew, sheet, header row, profile, and column mapping with a live preview.
- Start the batch and watch per-file progress as assignments are created.
The same card offers a one-shot Field Inventory profile scaffolding: click it to generate the standard field inventory profile for contents work, ready to publish and use.
Mobile-created assignments
If your org's mobile app setting allows it, org, business unit, and team admins can create assignments and manage assignment access directly from the iOS field app. Mobile-created assignments appear on teammates' devices on their next sync and show up in the console like any other assignment.