
Appearance
Capture settings
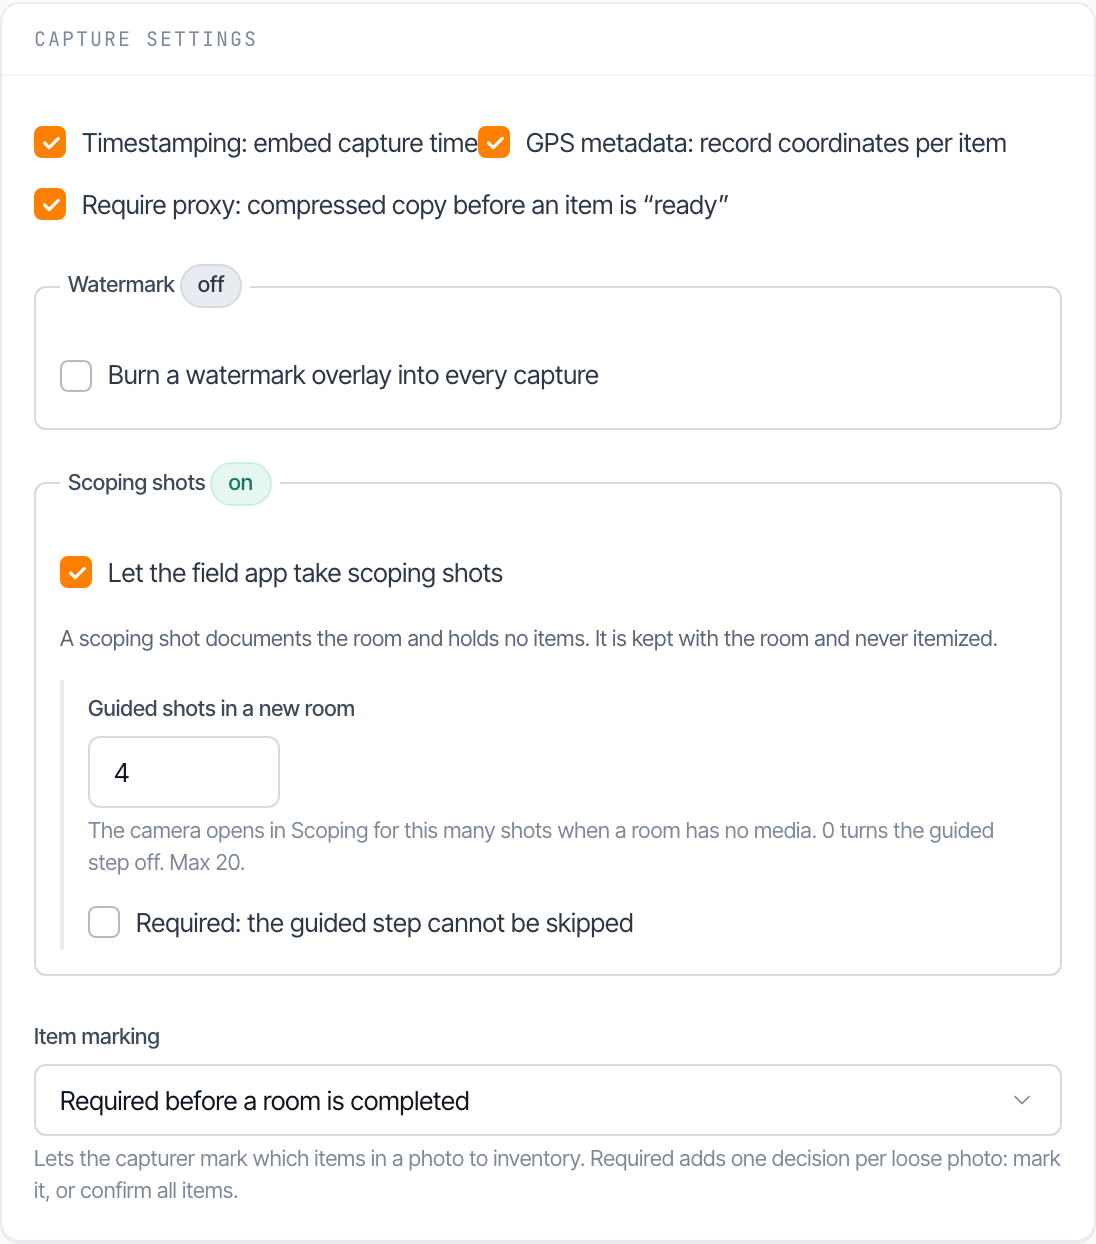
Capture settings are the evidence rules applied to every photo, video, and audio clip: timestamping, GPS metadata, proxy requirements, and watermarks. They also hold two capture intent settings, scoping shots and item marking, which tell the inventory team what a photo was meant to show.
Where capture settings live
Capture settings exist at two levels:
- Team defaults: set on the team detail page under Settings, labeled "Default capture settings".
- Per-assignment overrides: set on the assignment's Settings tab.
Both levels use the same editor.
Snapshot semantics
Capture settings are snapshotted onto each assignment at creation. The team Settings tab says it plainly: "These defaults are snapshotted onto each assignment at creation, so editing them never changes historical evidence."
In practice:
- Changing team defaults affects only assignments created after the change.
- Editing an assignment's own settings changes only that assignment.
- Two assignments from the same team can have different settings if the defaults changed between their creation dates.
Every option, with defaults
Timestamping
Default: on. Every capture records the exact time it was taken. Timestamps are the foundation of the audit trail and appear in the media metadata sidebar. Leave this on unless you have a specific reason not to.
GPS metadata
Default: on. Every capture records where it was taken, provided the field user has granted location permission on their device.
What field users see: the camera shows a "GPS on" indicator when location is flowing. If the device has not granted location permission, captures still work but carry no coordinates, and the Dashboard map shows "No GPS" for that adjuster. See Dashboard.
Require proxy
Default: on. A compressed copy (the "proxy") must be generated and uploaded before an item counts as ready. Proxies are what make the console's media grid and lightbox fast, since reviewers open the lightweight copy instead of multi-megabyte originals.
The original master file is always kept regardless of this setting. Require proxy only controls whether an item is considered complete for review before its proxy exists.
Watermark
Default: off. When enabled, a visible watermark is burned into review copies of captures. Watermarks are typically required by carriers for chain-of-custody documentation.
When the watermark is enabled, these sub-options appear:
| Option | Default | Meaning |
|---|---|---|
| Time | on | Burn the capture timestamp into the image. |
| User | on | Burn the capturer's name into the image. |
| Location | off | Burn GPS coordinates into the image. |
| Assignment | off | Burn the assignment name or reference into the image. |
| Custom text | empty | Free text of up to 120 characters, for example a claim number. |
| Logo URL | empty | An image URL for a logo to include in the watermark. |
| Logo position | bottom right | Where the logo sits: any corner or center. |
| Text position | bottom left | Where the text sits: any corner or center. |
| Opacity | 0.85 | How strong the watermark appears, from 0 (invisible) to 1 (fully solid). |
Scoping shots
Default: off. A scoping shot is a wide photo or video that documents the room. It holds no items, so it is kept with the room and never itemized. Turn this on when wide shots of a room are producing inventory lines nobody meant, for example a rug at the edge of a photo of something else.
When scoping shots are on, these options appear:
| Option | Default | Meaning |
|---|---|---|
| Guided shots in a new room | 4 | When a field user opens the camera in a room with no media, the camera starts in Scoping and counts the shots ("Scoping 1 of 4"), then returns to normal capture. Set 0 to turn the guided step off. The most is 20. |
| Required | off | When on, the guided step cannot be skipped. |
With scoping shots on, the field app also shows a built in Scoping control on the camera, so a field user can take a scoping shot at any time, and each room lists its scoping shots in their own box.
What field users see. The camera gets a blue border and a "Scoping: not itemized" label while Scoping is on, so a scoping shot cannot be taken by accident. Scoping applies to photos and video, never to audio notes. A field user can also fix a shot afterwards from the room screen (Mark as scoping or Unmark) until the room is completed. The Field Guide covers this under Scoping shots.
What you see in the console. A room's scoping shots are filed in one group named Scoping, which the app creates the first time it is needed. Filter the media browser by that group to see a room's scoping shots together. See Submissions and media.
What integrations receive. Each scoping photo or video carries intent: "scoping", and so does the Scoping group. Marking or unmarking a shot later fires media.updated. See the events reference.
Turning this on or off never changes media that was already captured. A photo keeps the intent it was captured with.
Item marking
Default: off. Item marking lets a field user mark which items in a photo to inventory, so a photo of a counter can mean "these five items" and nothing else.
| Choice | Meaning |
|---|---|
| Off | No marking. Every item in an ungrouped photo is inventoried, as today. |
| Optional | The field user may mark items on a photo. Unmarked photos mean all items. |
| Required before a room is completed | A room cannot be completed while it holds an ungrouped photo that is neither marked, nor a scoping shot, nor confirmed as "All items". One tap confirms. |
What field users see. A Mark action on each loose photo opens a screen where they tap to pin an item or drag to box it. A mark can be switched to exclude, which means "leave this out". Each thumbnail in the room then says what will be sent ("All items", "5 marked", "All except 1"), and the Mark room complete dialog totals the room, for example "7 photos: 4 scoping, 2 all items, 1 with 5 marked". The Field Guide covers this under Marking items.
What is not marked. Marking is offered on ungrouped photos only. A photo in a group is already one item, a scoping shot holds no items, and video and audio cannot be marked.
The photo is never altered. Marks are stored beside the photo as positions on it. The original file stays exactly as captured.
Choosing Required. Use it when your inventory team must never guess. It adds one decision per loose photo, so expect a little more time per room. The completion check is enforced by the server as well as the app, so it cannot be skipped from an old app version.
What integrations receive. Each photo carries its marks. Adding, changing or removing a mark fires media.updated. The "All items" confirmation is recorded on the photo as allItemsConfirmedAt; it does not change what the photo means and fires no event. See the events reference.
Marks lock with the room: once a room is completed they cannot be changed from the app or the console.
Burned-in watermarks and clean originals
The watermark is burned into review copies only. The original master file is always stored clean, with no watermark. This means:
- Reviewers in the console see the watermarked copy by default, which is what carriers usually want to see.
- Anyone reviewing media can toggle "Hide watermark (view clean original)" in the lightbox to inspect the untouched master. See Submissions and media.
- The Download original button always delivers the clean master file.
You never lose the unmarked evidence by turning watermarks on.
Guidance
When to enable watermarks:
- A carrier contract requires visible timestamp or identity marks on photos.
- Media will be shared outside your organization and you want provenance visible in every copy.
- Disputed claims where chain-of-custody questions are likely.
When to leave them off:
- Internal-only documentation where the audit log and metadata already provide provenance.
- Workflows where adjusters or clients need clean images for reports.
When to turn on item marking:
- Photos of several things together are producing inventory lines nobody meant, or missing the ones that matter.
- Start with Optional. Move to Required only if unmarked photos are still causing guesswork.
When to turn on scoping shots:
- The inventory team reports items that were only in the background of a wide shot.
- You want a consistent set of room photos on every job. Set the guided shots to the number you want and turn on Required.
Recommended defaults for most teams: keep timestamping, GPS, and require proxy on, and leave the watermark off unless a carrier asks for it. When a carrier does ask, enable Time and User (both already on by default), add the claim number as custom text, and consider Location on for catastrophe work where the exact capture site matters.